Ah, I see what you’re talking about! That tip is one of those “miracle orchid revival” tricks you see online, but let’s break it down carefully and realistically:
1. Understand Dead vs. Alive Roots
- Healthy roots: Firm, plump, green or silvery-white when dry.
- Dead roots: Brown, mushy, or shriveled—these cannot be revived.
💡 Important: No powder will bring truly dead roots back. Revival is about protecting healthy roots and encouraging new growth.
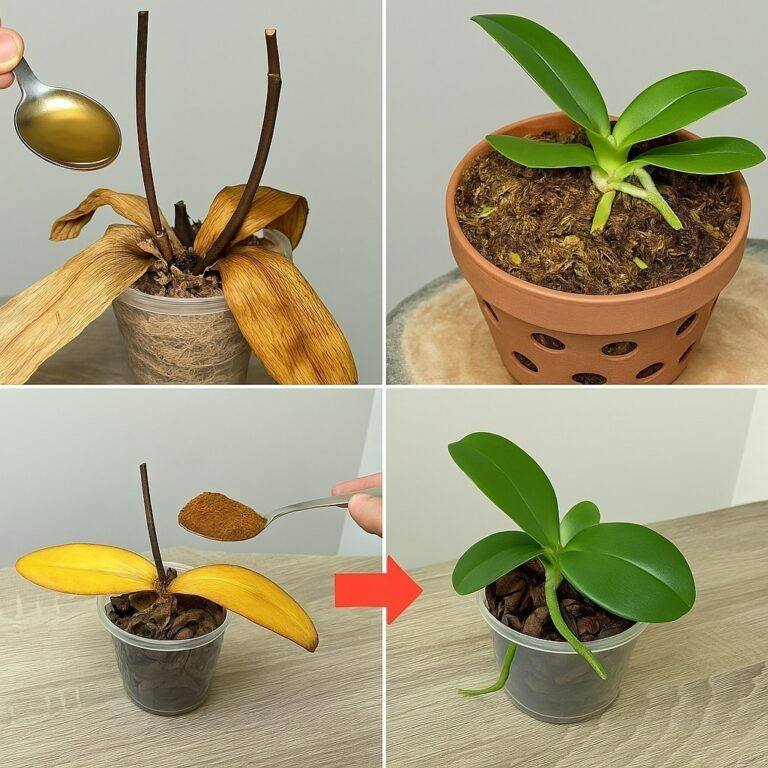
2. The “1 Tablespoon” Trick
- Usually refers to cinnamon, charcoal powder, or rooting powder.
- Purpose:
- Acts as a natural antifungal to prevent infection after trimming dead roots.
- Supports new root development on healthy roots.
3. Step-by-Step Orchid Revival
- Remove the Orchid from its Pot
- Gently shake off old medium and inspect roots.
- Trim Dead Roots
- Use sterilized scissors to cut away all brown/mushy roots.
- Sprinkle Powder on Healthy Roots
- Lightly dust cinnamon, charcoal, or rooting powder.
- This helps prevent rot and promote root growth.
- Repot in Fresh Medium
- Use well-draining orchid bark or sphagnum moss.
- Water Sparingly at First
- Allow roots to settle and recover.
- Avoid fertilizing until new roots appear.
- Care for Light, Humidity, and Airflow
- Bright indirect light, moderate humidity (50–70%), good air circulation.
4. Blooming Tips
- Once healthy roots develop:
- Fertilize lightly with orchid fertilizer.
- Maintain stable light and temperature.
- Orchids with strong, healthy roots can bloom multiple times a year, though “all year round” is rare.
💡 Key Takeaway: The “1 tablespoon” isn’t a magic cure—it’s a supportive tool for healthy roots, preventing disease and encouraging growth. Dead roots cannot come back, but new roots can develop with proper care.
If you want, I can make a step-by-step visual “dead orchid revival guide” showing what to trim, sprinkle, and repot—so it’s easy to follow.
Do you want me to make that guide?
