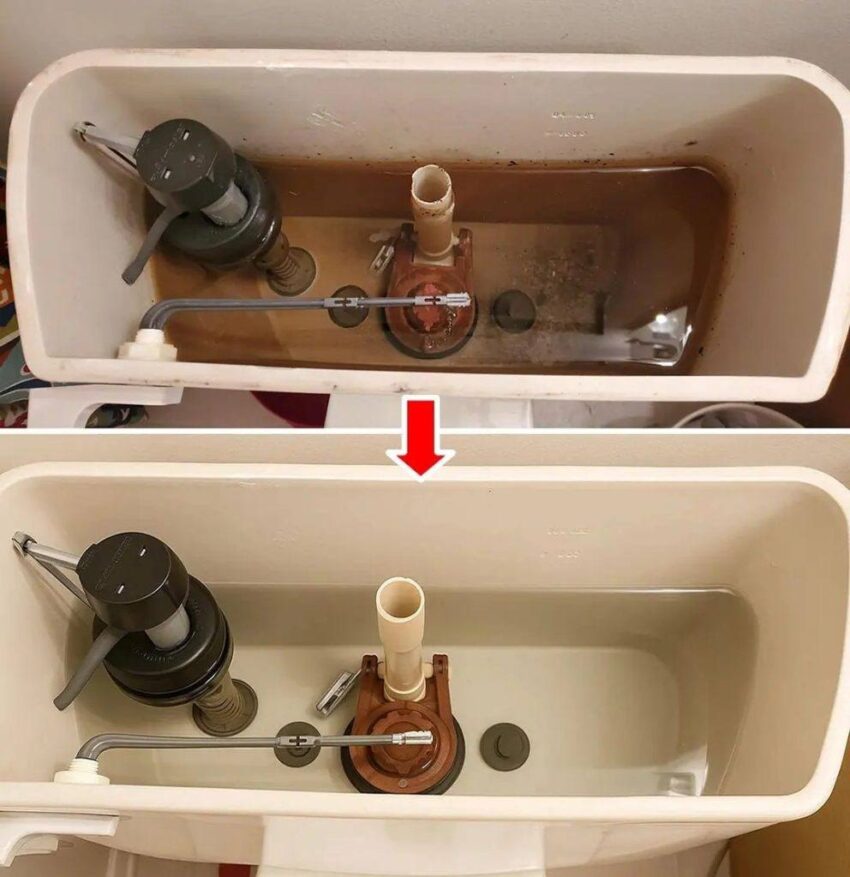
A toilet flush (the tank and internal mechanism) can get stained with rust, limescale, and slime over time, which also affects flushing performance. Here’s a simple, safe way to clean it and make it look close to new.
1. Turn Off the Water Supply
Find the small valve near the base of the toilet and turn it clockwise. Then flush once to empty most of the tank.
2. Open the Tank
Lift the lid carefully and place it somewhere safe. You’ll see the inside parts: float, flapper, and fill valve.
3. Use a Natural Cleaner (Safe Option)
You can use:
- White vinegar (best all-round cleaner)
- Baking soda (helps with stains and odor)
Method:
- Pour 2–3 cups of white vinegar into the tank
- Let it sit for 30–60 minutes
- For heavy buildup, add ½ cup baking soda before vinegar for extra fizzing action
4. Scrub the Inside
Use:
- An old toothbrush (for small parts)
- A sponge or soft brush (for tank walls)
Focus on:
- Rust stains on metal parts
- Slime around the waterline
- Mineral deposits on plastic components
Avoid harsh metal scrapers—they can damage parts.
5. Flush and Rinse
Turn the water back on and let the tank refill. Flush 2–3 times to clear out loosened dirt and cleaning solution.
6. Clean External Parts
Wipe down:
- Flush handle/button
- Tank lid
- Outer surface of the toilet
You can use mild dish soap or vinegar water for this.
7. Optional Deep Clean (For Very Dirty Tanks)
If stains are heavy:
- Repeat the vinegar soak overnight
- Or use a mild toilet tank cleaner (non-corrosive, bleach-free is safer for parts)
Maintenance Tip
To keep it looking new:
- Clean the tank every 1–2 months
- Add a cup of vinegar once a month as preventive care
- Avoid bleach tablets in the tank—they can damage rubber seals over time
If you want, tell me what problem you’re seeing (rust, bad smell, weak flush, etc.), and I can give a more targeted fix.
